 |
 |
Before we begin, it’s important to know that there are various types of frames that you can incorporate into your beehive along with various types of wire for beehive frames that can be used in the process.
Your hive configuration and your final goal will determine what type of frame and beehive wire you use.
One of the most common types of beehive frames available on the market and the one we are going to focus on today is the Wedge Top Bar / Grooved Bottom Bar wooden frame. This type of frame has a wooden piece called the cleat and this runs along the top bar. This wedge cleat is only removed for the assembly of the frame and is then replaced. The bottom bar which is grooved holds the foundation.
The wedge cleat frame is ideal for use with both plastic foundations and wax foundations.
For a more versatile option, use it with starter strips.
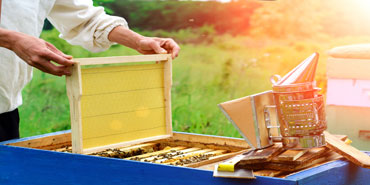
Assembling the frame is the most important task when building a beehive as the frame is the foundation / strength of the entire hive. This is what you will need:
• Hammer, razor blade, wood glue, 10 beehive frame nails which are wire nails, paper towels, carpenters square and the four pieces of wood chosen to be your main frame.
Then simply follow these steps:
• The cleat wedge must be removed. This is done by running your razor blade along the side of the top bar. Using your blade, make sure that any debris or pieces are kept away from the wedge and the top bar. Save the wedge cleat to be used at a later stage.
• Now you can place a small amount of glue in the top upper groove of one of the side bars. This is found on the thicker part of the side bar.
• Fit a top bar into the sidebar in order to make contact with the glue. Ensure that you apply a little pressure so that the pieces fit together properly.
• Repeat the process for the other side bar and secure it to the opposite side of the top bar. The two pieces and top bar should now form a 3-sided frame so far.
• You can now turn the frame upside down and make sure that some glue is added to the side bar’s bottom grooves. Make sure that you clean up any excess glue with your paper towel as you work.
• With the groove facing inwards, insert the bottom bar into the frame and apply some pressure.
• Now you can nail the frame together with 4 nails on the top, 4 nails on the bottom and 1 nail into each side of the frame. Repeat this with nails on the bottom of the frame.
• Make sure that you have 2 nails on the top of the frame on each side and check to see that the frame is square.
• Finally, hammer a nail into the thick side of the frame near the top bar. Flip the frame over and repeat on the opposite side. Your frame will now be sturdy and the top and side bars will not easily separate.
• That’s it! You will now have a finished beehive frame that’s ready for the installation of the wax or plastic foundation!
After you have built your beehive frame, it’s time to wire the frame firmly with the correct stainless steel wire! Simply make sure that you have the correct wire and technique!
Get top quality stainless steel wire for beehive frames at Stainless Steel Wire
At Sadevinox we supply top quality wire for beehive frames at competitive prices. Our stainless steel wire is ideal for finishing off your hive to perfection. For more information and advice on our stainless steel wire for beehive frames, contact us at Sadevinox via This email address is being protected from spambots. You need JavaScript enabled to view it. or telephone today.
